Hope you are doing well and staying healthy!!!
Welcome to the next blog in the GST series, in this blog we will talk about doing Tax setup in different modules of D365 to enable for GST transactions e.g. Product, Inventory, Vendor, Customer etc…
So, let’s start.
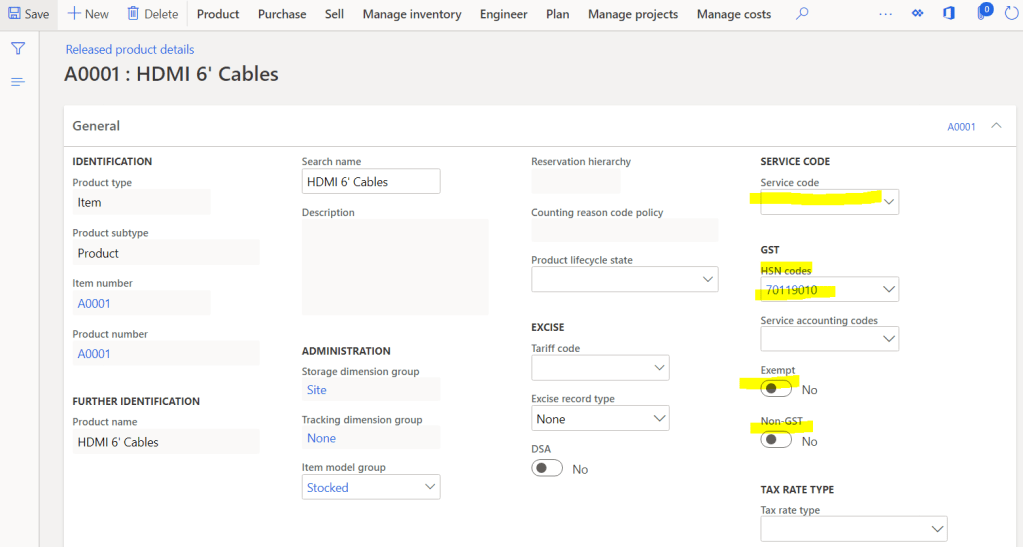
Step-1: Tax information mapping to product master
I this step we have to map following things to product:
HSN/SAC: To identify the rate for the product, HSN for goods and SAC for services
Exempt: Enable this if the product or service is exempted from GST e.g. Milk, Vegetables etc…
Non-GST: Enable this if product does not fall under GST but you want to mark the product
Navigate to, Product information Management > Products > Released Product > Select Product > Edit > General Tab
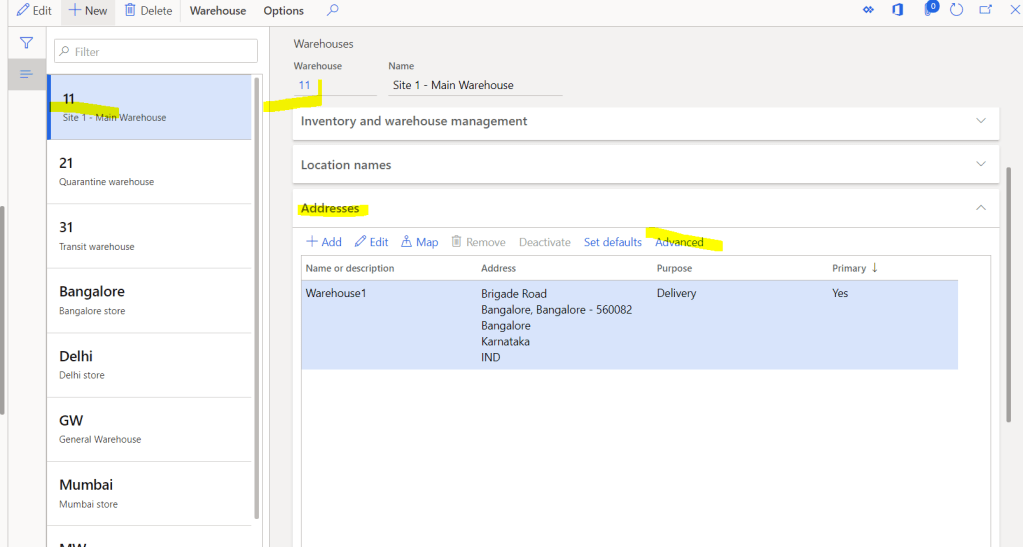
Step-2: Tax information mapping to inventory locations
If we have inventory products to purchase and sales though site, warehouse then we need to map “GST Registration number” which we have created as master in last blog to all the addresses of site or warehouses.
Note: If we do not map any GST registration to the location and use in the transactions, then system will understand location as “Un-register” and also will calculate “Intra-State (CGST &SGST)”.
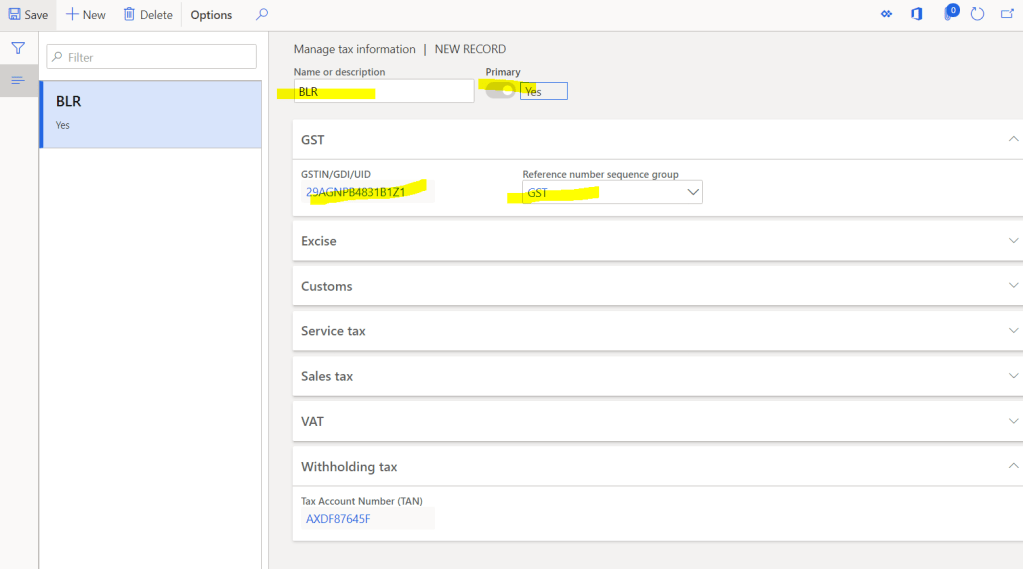
Now, many people will ask what if we do not define the GST at warehouse but define at the site or do not even define at site but only at legal entity, so here is the priority system will give to find GST registration for any location.
Priority -1: Warehouse
Priorty-2: Site
Priorty-3: Legal entity
Navigate to, Inventory Management > Setup > Inventory breakdown > Site/Warehouse (I am taking warehouse)

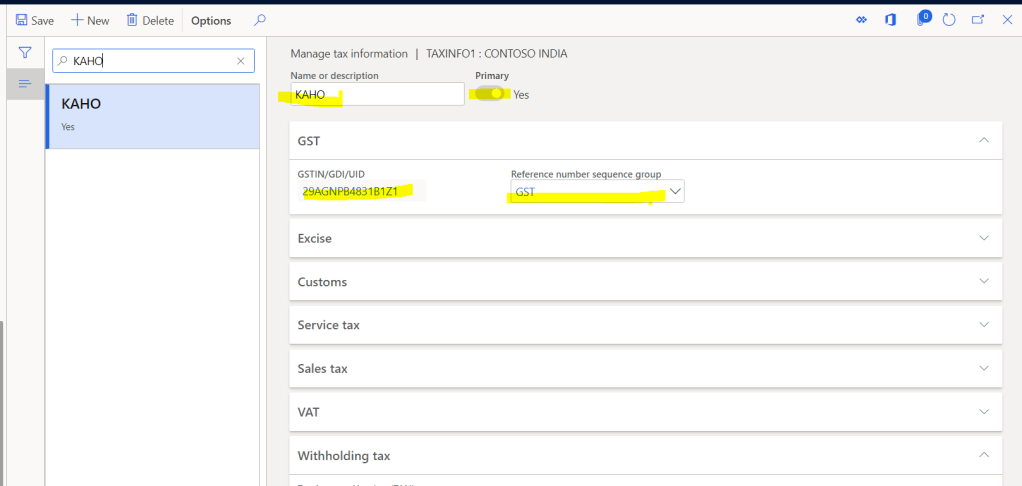
Tax information, Define the GST registration number and GST number sequence group, Now GST reference number sequence group has to be mentioned as per the number sequence requirement for that location (Explained in last Blog)
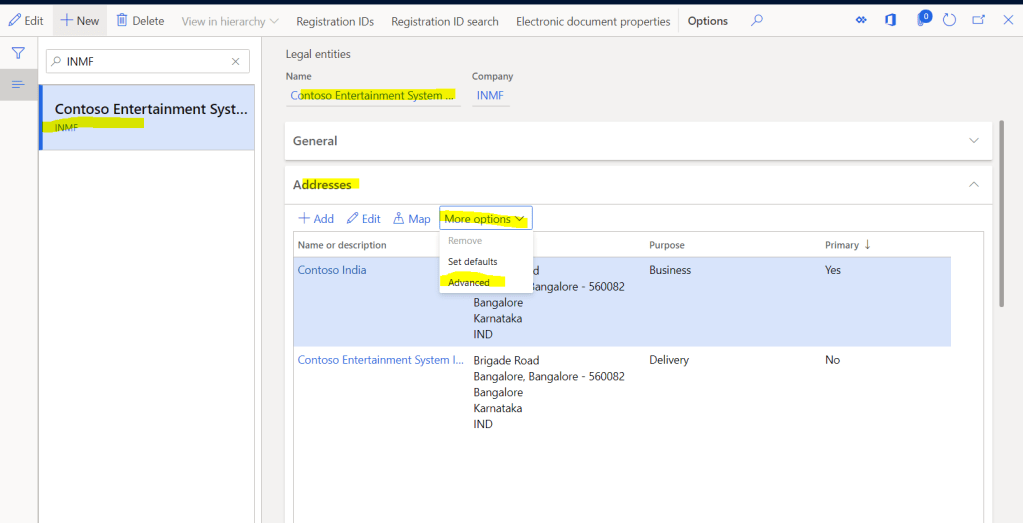
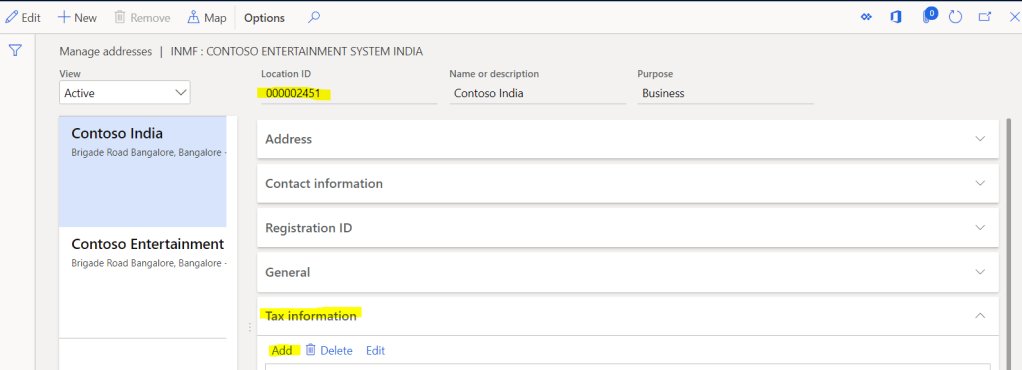
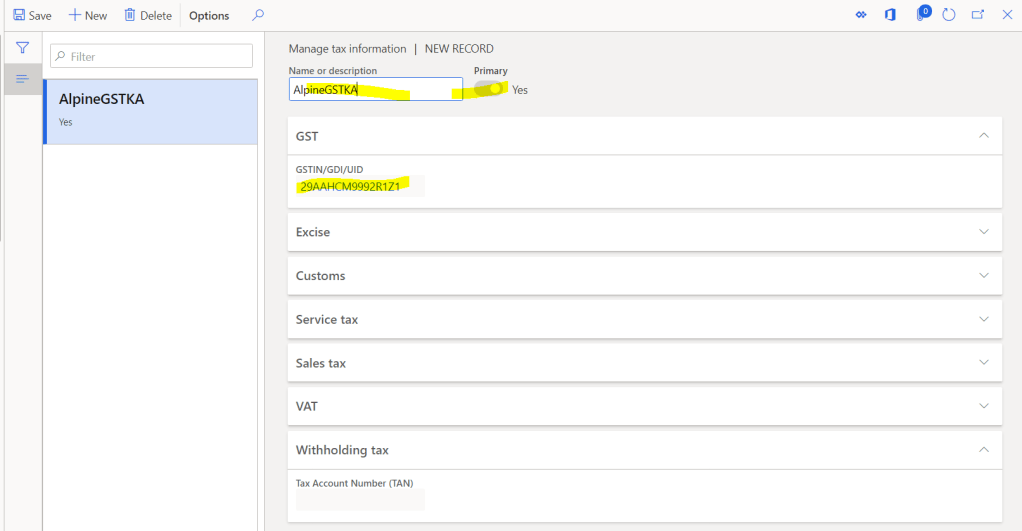
Step-3: Tax information for Legal Entity,
We need to define the GST registration number for all the address in legal entity. This will be used in all the transactions where we cannot select site/Warehouse, in that case GST registration will be selected from legal entity address e.g. Invoice journal, Free text invoice
Navigate to, Organization administration > Organizations > Legal entities > Address
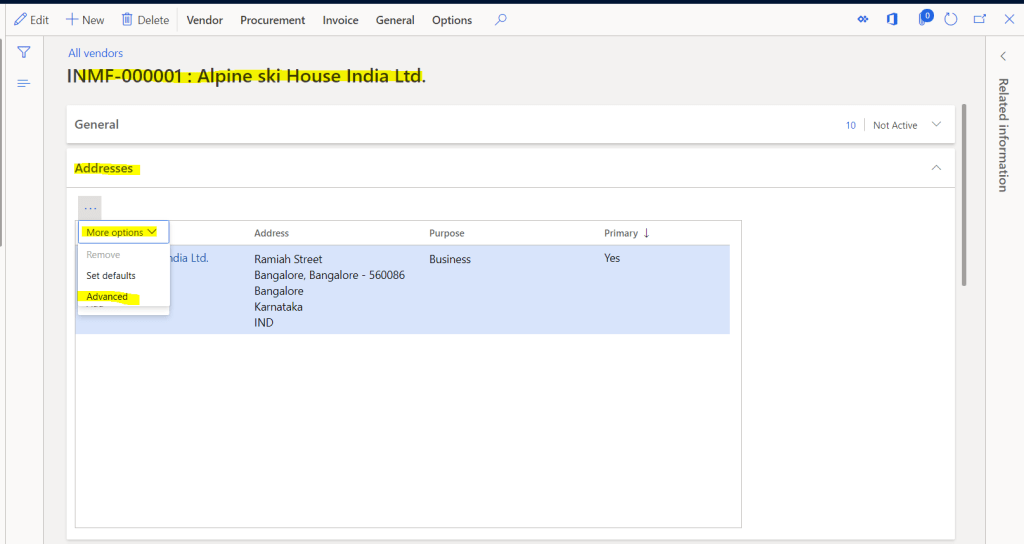
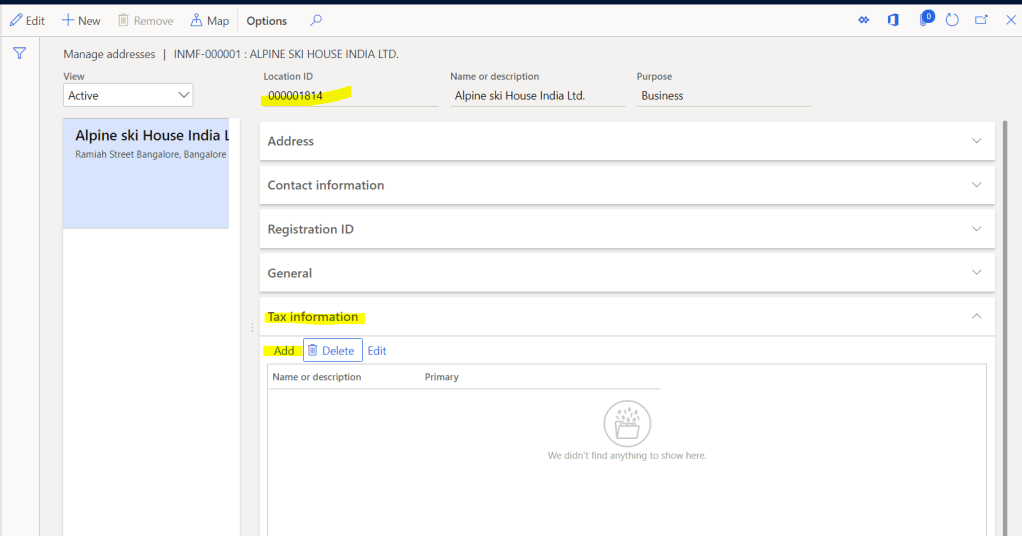
Step-4: Tax information for vendor master,
After mapping GST registration for internal addresses, we need to map the GST registration for vendor master as well.
Note: Any vendor address where GST registration is not mapped and used in any transaction, that vendor will be considered as “Un-Registered” vendor.
Navigate to, Account Payable > Vendors > All vendors > Edit > Address tab
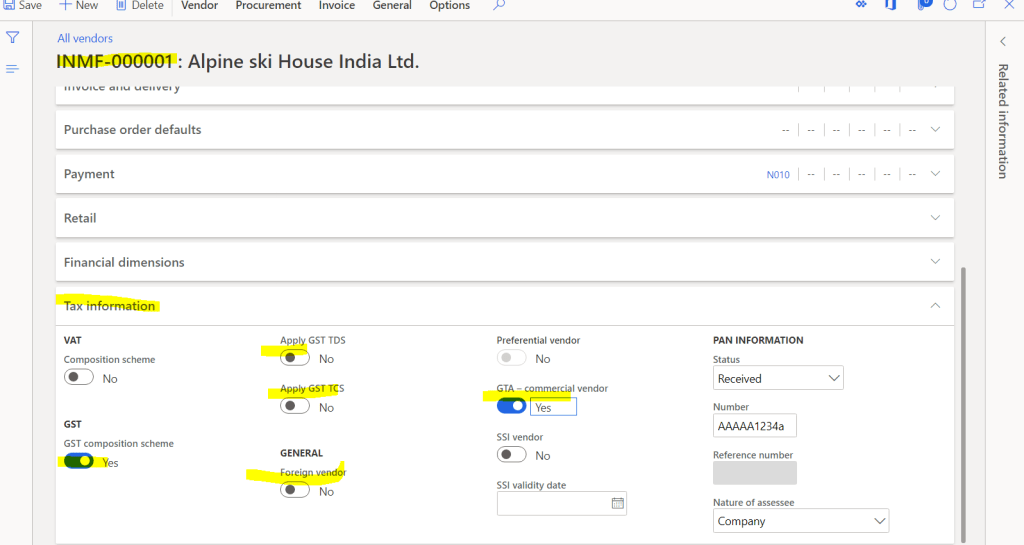
Step-5: Other Tax setup for vendor
Other than GST registration mapping, we can have others setups on vendor
GST Composite Scheme, GTA Vendor, Foreign Vendor etc…
Navigate to, Account Payable > Vendors > All vendors > Edit > Tax information tab
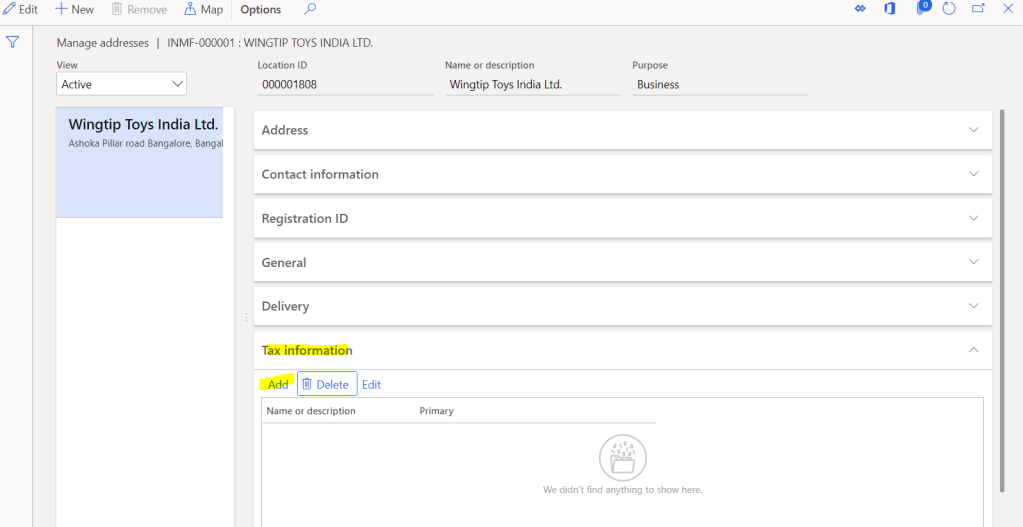
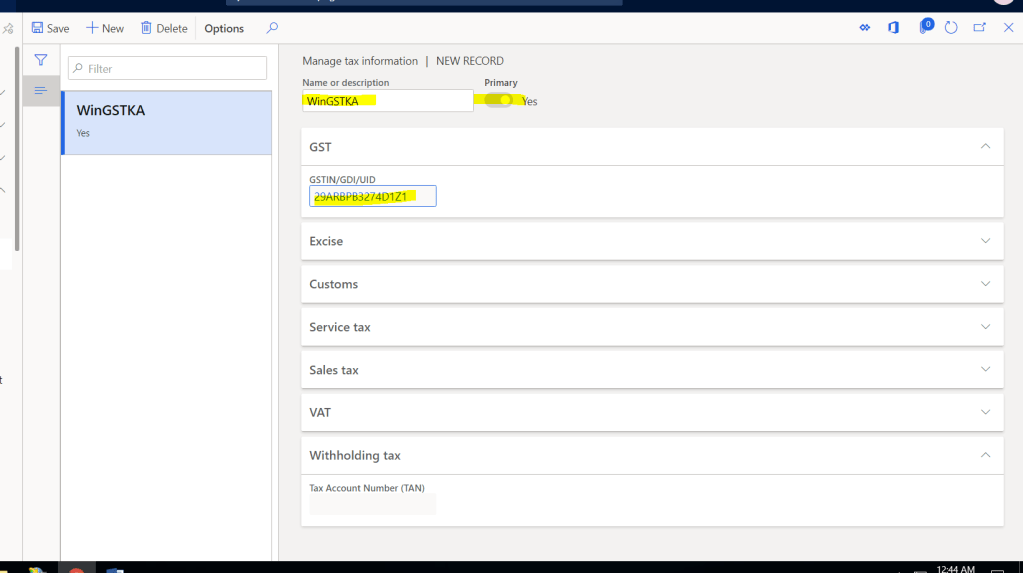
Step-6: Tax information for customer master,
After mapping GST registration for internal addresses, we need to map the GST registration for customer master as well.
Note: Any customer address where GST registration is not mapped and used in any transaction, that vendor will be considered as “Un-Registered” customer.
Navigate to, Account Receivables > Customers > All Customers > Edit > Address tab

That’s it for this blog, I will be back with next blog soon where we will give final touch to the GST Tax setup and after that we can move to the Transactions.
Thank You for reading my blog, please share with your network and give your feedback.
